Using gemstones as body adornment is as early as civilization itself. From the Egyptian amulets to the jade carvings of ancient China, there are several references to gemstone adornment. This act of making adorable jewelry from gemstones is still trendy today.
To create jewelry from gemstones, you need to gather your materials, create your design, measure and cut the wire, arrange the gemstones, add hooks, use the appropriate finishing and polish your jewelry.
Most gemstones are mined from the earth. However, their outward appearance might not give sensual beauty.
Miners often polish and treat them to enhance their beauty. For instance, raw emeralds (one of the most precious gemstones) are treated with resin, wax, or oil to eliminate the flaws.
Some of the common and most precious gemstones for making jewelry include;
- Diamond
- Emerald
- Ruby
- Sapphire
- Amethyst
- Opals
- Brown zoisite
- Onyx
- Garnet
- Moonstone
These gemstones have different values, and some are more precious than others.
There are several types of jewelry you can make with these gemstones. The most common jewelry includes earrings, necklaces, rings, bracelets, and pendants.
Any creative person can make incredible pieces from gemstones.
You might not even need a unique, expensive, and high-tech tool to make a fantastic piece with a gemstone.
But you can always find a skilled jeweler whenever you need help.
This article shows you how to make a necklace and a ring with gemstones.
Let’s start with making a necklace from gemstones.
Below are easy steps to follow for a gemstone necklace.
STEP 1: Gather your materials
The first step in making any crafty task is gathering all the necessary materials to complete the process.
The essential materials you would need for the process include;
- Any gemstone of your choice
- Craft wire (Chain nose plier and Looping plier)
- Jewelry pliers
- Mandrel
- Wirecutter
- Hooks
- Sandpaper
- Rubber wheels
You can use any gemstone to make a necklace or its pendant.
You can decide to use only one type or mix two or more rocks in a single necklace.
Also, the kind of necklace you intend to make will determine the required materials for the process.
STEP 2: Create your design
The choice of gemstones (if you would use one or mix various types) is dependent on the design you create.
Creating necklaces with gems allows you to be as creative as you want to be.
You can imagine and create a new design concept for yourself. Alternatively, you can take inspiration from an existing jewelry design. It is easier and best for beginners when you have a lead that you can follow.
There are different types and designs of necklaces. Some gemstone necklaces include pendants, and some don’t.
Similarly, there are different types of pendants. Some pendants are customized alongside the chain, while others are created independently.
STEP 3: Measure and cut the wire
It is best to have a wire with an extended length. The length you need is dependent on how long or short you want the necklace to be.
If you customize the neckpiece for a particular individual or yourself, you can measure the neck circumference. Your measurement will determine where and how to cut the jewelry wire. Remember to leave some excesses when cutting the wire to create space for hooks at both ends.
The clips are essential for attaching and connecting the ends of the necklace. Without the extra length, the necklace might end up choking even with perfect measurement.
STEP 4: Arrange your gemstones
Stone setting or gemstone arrangement comes when you are through with all the metal works to avoid damaging the stones accidentally.
Wrap one end of the wire with tape to prevent it from slipping out. Carefully slide in the gemstones one after the next, passing the wire through the hole. Slide it in as orderly as possible, following your pre-planned sequence. Keep the space between each gemstone tight to avoid open spaces. Add a gem at a time to prevent any from sliding off.
When creating a necklace with a pendant, fit the stones for the pendant first.
Hold the stones carefully and fit them into the wire one after the next.
Handle soft stones like opal carefully and only apply gentle pressure. But you might not consider pressure if you are working with harder stones like diamonds and sapphires.
Cross the wire gently at the end of the pendant to create a distinct barrier.
Depending on your design, you can add an extra stone to make the pendant more distinct.
Your design will determine the sequence of your stone setting, while your measurement will determine the number of stones you would need.
Here’s a video on how to set your stone.
STEP 5: Add the hooks
Once you are through with the stone setting, you can fit the clips on both ends. The hook will prevent the stones from falling off and keep them strapped around the neck.
Add the hooks to both ends of the necklace to strap it around the neck.
Add a wire guardian right after the last gemstone to prevent the last gem from rubbing on the hooks. Add the curve part of the wire guardian into the end of the hook. Poke the wire back, this time through the hook’s head. Press the curve of the wire guardian to hold the wire tightly. Then tim off excess wire with your cutter. Remove the paper tape at the other end and repeat the process.
There are several types and designs of hooks. Most of them are available for sale, and it is best to add them to the list of materials you would need for your project.
Fixing the hook depends on the type you are using, but they are generally straightforward.
Here’s a video on how to attach a hook to your necklace.
STEP 6: Finishing and polishing
Finishing and polishing is the final part of making a necklace from jewelry.
Polishing and finishing will get rid of all lags on your project.
Use rubber wheels and sandpapers for polishing to remove every facet and dirt from the jewelry. Avoid using sandpapers or abrasives on softer gemstones. But it is usually okay for harder stones like sapphire and diamonds. For cleaning, use a steam cleaner or dishwashing liquid, warm water, and a soft cloth.
Keep in mind there is a probability of the stones getting damaged at any point. So, it is best to be careful all through the entire process.
The finishing process also includes keeping the stones clean and sparkling. You can use steam cleaners, but don’t forget that the durability of the stones varies with hardness.
Alternatively, you can use a mixture of warm water and a small amount of dishwashing liquid with a soft cloth.
The entire process does not take time, especially if it is not your first time. Look out for any potential flaws and perfect your project.
Here is a video showing the complete process of making a necklace from gems.
Feel free to explore, and don’t fear making mistakes, especially if it is your first try.
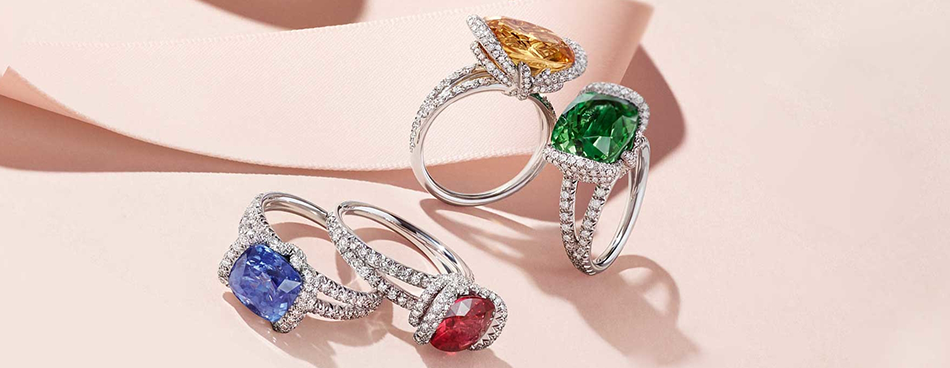
How to make rings with gemstones
Another classic piece of jewelry made from gemstones is a ring. Rings are worn to adorn the finger, and they usually sit pretty well.
Most people often make rings when they have leftover gems. However, you can also make it a core project.
The guide below offers easy steps to help you create a unique ring from gemstones. Let’s find out!
STEP 1: Gather the materials
Making rings with gemstones is not something you can jump into. You have to follow simple steps to get it done, and the first step is to gather your materials.
Materials and tools you need for the process include;
- An oval-shaped gemstone of your choice
- Craft wire (Chain nose plier and Looping plier)
- Jewelry pliers
- Mandrel
- Side cutters
- Snipe nose pliers
- Flat nose pliers
- Triblet
STEP 2: Form the gemstone’s base
Pick up your mandrel and your craft wire to create a base for your gemstones.
Wrap the wire around the mandrel two times. Keep an equal length of craft wire at both ends. After wrapping the wire around the mandrel, coil the craft wire in a clockwise motion to form the base for the gemstone.
The size of your wrap determines how large your ring will be.
Make sure the coils you form around the mandrel are flat and perpendicular to the ring formed by the wire.
You can place a single ring or multiple rings on the base of your gemstone.
The bottom should take the form of a wave if you get this right.
STEP 3: Complete your base
You have the structure that is almost ready to accommodate your gemstone to complete the ring.
Complete the bottom by pressing a flat nose plier against the base. It will make the bottom flatten and widen enough, ensuring that the gemstone stays perfectly on the bottom.
Pick one end of the wire and wrap it around the ring till it gets to the bottom middle.
Do the same to the other end of the wire.
The result is a wound ring and a flat base.
STEP 4: Weave your ring
Weaving your ring is quite essential as it adds more beauty. It is also straightforward as it requires you to only wound the craft wire around the ring.
Keep wrapping the craft wire till you get to the other side of your gemstone base. You have to be careful while wounding the wire so you won’t cause an overlap. Depending on your design choice, you can either make the weaving a sparse one or a tightly packed one.
Make sure the wires are laid well beside one another while weaving the ring.
Now, you should have your two ends of the wire back to the top of the base you initially created for your gemstone.
STEP 5: Add your gemstone
After making your ring and setting your base ready, all that remains is for you to add your gemstone.
Find the center of the gemstone base you already created and carefully place the gemstone. Once you are sure that is exactly where you want your gem, press it tightly against the base. Wrap your craft wire around it to hold the gemstone firm against the base.
While wrapping the wire around the gem, hold it firmly to the bottom to prevent wrapping mistakes.
You can create different designs with your craft wire wrapping around your gemstone.
You can make simple swirls and wraps around your gem to hold it to the base and provide it a unique appearance.
You should also trim excess craft wire from the ring to perfect your design.
With these done, you have your ring made from gemstone.
Conclusion
To create jewelry from gemstones, you need at least the gem, wire, pliers, and cutters. Next, create a design, measure and cut the wire, arrange your gemstones, add hooks, and give it the necessary finishing and polish the jewelry.
Creating different jewelry from gemstones isn’t as challenging as it appears to be. In fact, the enormous task is figuring out and get the best gem for you.
If you need a professional to handle your gemstone jewelry, you can find one on Jewelers Connect.
Jewelers Connect allows you to find a trusted jeweler online who understands your needs and fits your budget.
Create your free account to get started!